Petasense
Vibration Mote – How to Change Batteries
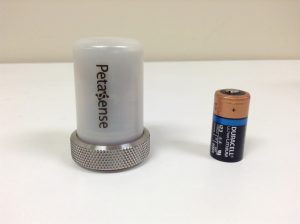
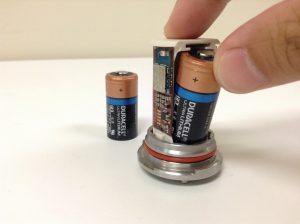
The Vibration Mote (Model 1 and Model 2) is powered by a single 3V CR123A battery. To achieve optimal battery life, we recommend using Duracell brand batteries. Changing a Mote’s battery can be accomplished in 3 simple steps.
- 1. Access the battery housing
- 2. Insert battery and confirm WiFi connection
- 3. Re-mount the Mote
- IMPORTANT: Before handling Petasense Motes, thoroughly wash your hands and avoid getting dirt or other particles inside the device.
Let’s get started!
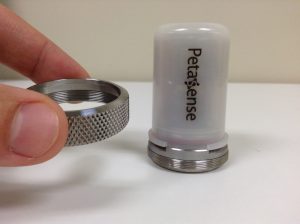
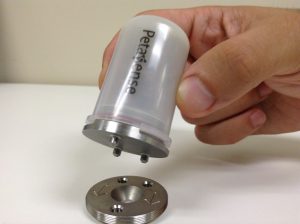
Step 1 – Access the battery housing
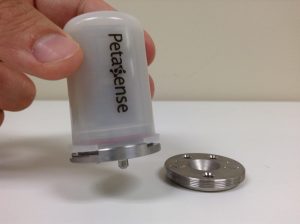
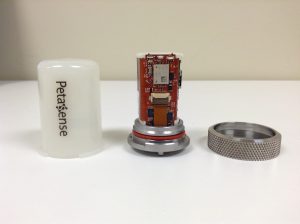
Remove the S-ring at the base of the Mote by turning it counter clock-wise. Carefully remove the Mote from the machine – the mounting disc will stay attached to the machine. Grip the steel base of the Mote and pull the cover off to access the battery housing.
Step 2 – Insert battery and confirm WiFi connection
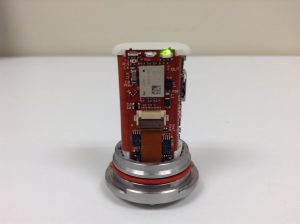
Remove the old battery and insert a new one. On the circuit side of the Mote, you will see a series of red and yellow blinking LEDs, eventually displaying a slow, blinking green LED in the top-right corner. This indicates that the Mote has successfully connected to WiFi.
If the LED remains red or yellow, you will need to configure the Mote to connect to your WiFi network. **If the LED doesn’t light up, you may first need to ground the device. To do this, use the S-ring (or any conductive material) create a connection between the positive and negative ends of the battery housing.
Step 3 – Re-mount the Mote
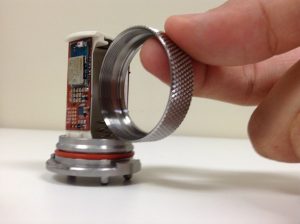
Once the Mote has shown a blinking green LED, replace the cover. It will only fit properly in one direction, with the Petasense logo over the circuit side of the Mote. Place the covered Mote back on the mounting disc, which is still attached to the machine. The Mote will only fit in one direction on the mount. Finally, slide the S-ring over the top to the base of the Mote and secure it by turning clockwise. Hand-tighten the S-ring firmly, ensuring that it will not rattle or become loose.

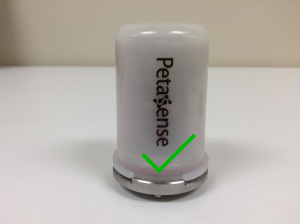
Battery Change Complete!